To fix scratches on wood floors, first clean the area, then, depending on the depth, apply a filler or wood stain. For shallow scratches, a simple touch-up with a wood marker can be effective.
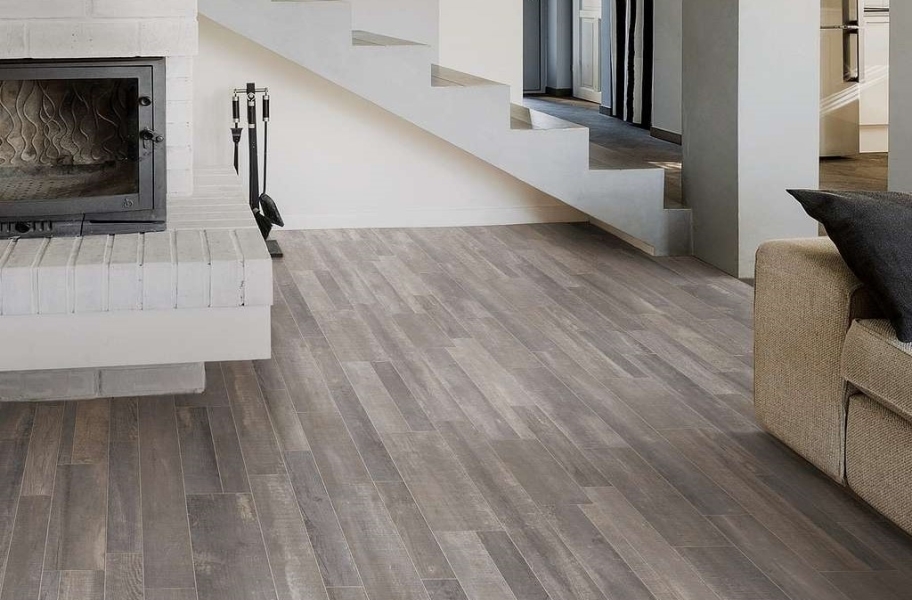
Scratches on wood floors can significantly detract from your home’s aesthetics. Despite their durability, it is not uncommon to find them marred by scratches and scuffs over time. Fortunately, with suitable materials and a bit of elbow grease, you can restore your wood floors to their former glory.
Addressing these blemishes promptly can prevent further damage and maintain the integrity and beauty of your flooring. Whether you’re dealing with light scrapes or deeper gouges, there’s a repair method suitable for the severity of the damage. In the following sections, we’ll guide homeowners through the simple steps necessary to fix scratches on wood floors, ensuring their living spaces remain as inviting and pristine as possible.
Introduction To Wood Floor Maintenance
Proper maintenance breathes longevity into wood floors. A stunning fixture in any home, these floors require specific care to stay lustrous and robust. Understanding how to tend to inevitable blemishes, like scratches, is critical. This guide unveils steps to fix scratches and keep your wooden floors in pristine condition.
The Charm Of Wooden Floors
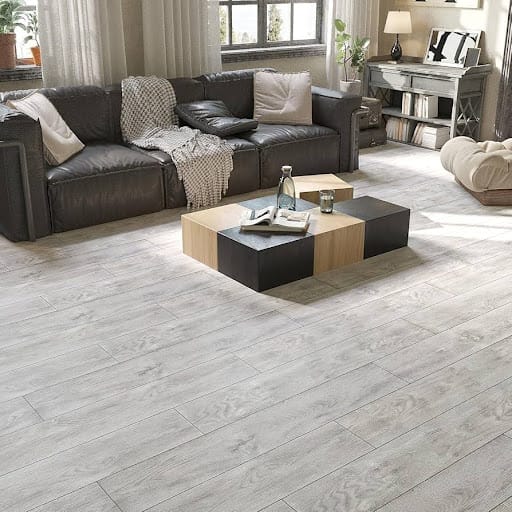
Wood floors add warmth and elegance to any space. Their timeless appeal enhances a room’s beauty and value. With proper upkeep, wood flooring can last for generations, making it an intelligent investment for homeowners.
Scratches: An Inevitable Nuisance
Despite their strength, wood floors aren’t immune to scratches. From daily foot traffic to the occasional furniture mishap, scratches are bound to occur. But fear not, as simple remedies exist to mend these surface woes and restore your floor’s shine.
Identifying the Severity of Floor Scratches is crucial before attempting any repairs on your wooden floors. Knowing the depth and type of scratch will determine the best fix. This is similar to diagnosing before treating—it ensures effective restoration of your wood floor’s beauty.
Different Types Of Scratches
There are generally three types of scratches that can mar your wood floors:
Superficial scratches that affect only the finish.
Minor scratches that get through to the wood.
Deep scratches that gouge into the wood, causing visible dents.
Assessing Scratch Depth
Once you’ve identified the type, assess thescratch’ss depth:
Run a fingernail over the scratch. Can you feel it catch?
If there is no fingernail catch, it is likely a superficial scratch.
If the fingernail catches slightly, it is a minor scratch.
A deep fingernail catch means a deep scratch.
Use good lighting to get the best look at the scratches. Find those that need immediate attention. C
consider this table to help you:
Scratch Type
Visibility
Repair Method
Superficial
Hard to see
Refinishing products
Minor
Visible up close
Filler sticks, touch-up kits
Deep
Very visible
Wood putty, professional repair
Note the number and area of scratches. This helps decide whether to repair a small section or the whole floor. Any scratch can be fixed with patience and the right approach.
Preparation Steps Before Fixing Scratches
Preparing your wood floor before fixing scratches is a crucial first step. It ensures that the repair blends seamlessly with the surrounding area. A well-prepared surface allows for the best possible fix. So, let’s dive into these preparation steps.
Cleaning The Scratch Area
Remove any dirt or debris from the scratch to start with a clean slate. This helps the repair materials adhere correctly. Use a soft brush or a vacuum with a brush attachment to gently clean the scratch. Wipe the area with a damp cloth, then dry it to avoid any moisture-related issues.
Gathering Necessary Materials
Collecting the suitable materials beforehand will make the repair process smoother. Below is a list of items you’ll need:
Fine-grit sandpaper – To smooth the area
Wood filler – To fill deeper scratches
Wood stain or crayon – To match your floor’s color
Wood floors add warmth and beauty to your home, but scratches can diminish their charm. Don’t worry—you can fix minor scratches quickly. Grab some everyday items and follow these steps.
Using A Walnut Or Pecan
Believe it or not, walnuts and pecans can hide scratches. They contain natural oils that darken the wood, making scratches less noticeable.
Take a walnut or pecan and rub it gently over the scratch.
Press the nut’s meat into the scratch.
Let the oils work for about five minutes.
Buff the area with a soft cloth.
Applying Wood Markers Or Crayons
Wood markers and crayons are great for matching the color of your floors. They fill in and camouflage scratches.
Choose a marker or crayon close to yourfloor’ss color.
Apply it directly to the scratch.
Wipe away any excess with a cloth.
Let it dry for a few hours.
Diy Fix #2: Concealing Moderate Scratches
Welcome to DIY Fix #2, where we tackle moderate scratches on your cherished wood floors. These unsightly blemishes can be a pain, but don’t worry—we’ve got intelligent, easy-to-follow solutions that will make your floors look nearly new again.
Wood Filler: Scratch’sh’s Best Friend
For moderate scratches, wood filler is your go-to solution. Here’s a simple guide:
Pick the right color of wood filler that matches your floor.
Apply the filler carefully to the scratch.
Let it dry completely, which may take a few hours.
Remove excess filler with a putty knife or cloth.
A perfect color match is crucial. Take a small sample or picture of your floor when shopping for fillers.
Sanding For Perfection
After the filler dries, sanding is subsequent. Follow these steps:
Using fine-grit sandpaper, gently sand over the filled scratch.
Sand in the direction of the wood grain to avoid more scratches.
Wipe away dust with a clean, damp cloth.
Sanding makes the surface smooth and prepares it for the final touch. Be gentle to avoid further damage. With wood filler and sanding, those moderate scratches will be gone. Your floors will thank you for the TLC!
Diy Fix #3: Tackling Deep Gouges
Preventive Measures For Scratch-free Floors
Keeping wood floors gleaming requires a proactive approach to minimize scratches. Preventive measures protect the wood’s surface to ensure longevity. By integrating regular maintenance and using floor protectives, floors stay scratch-free for years to come.
Regular Floor Care
Routine floor care is the first line of defense against scratches. Consider these tips:
Sweep daily with a soft bristle broom.
Use a microfiber mop to trap dirt and debris.
Clean spills immediately to prevent damage.
Avoid harsh cleaners; opt for PH-neutral solutions.
Protective Pads And Rugs
Protective accessories like pads and rugs act as a barrier:
Accessory
Placement
Benefit
Felt Pads
Under furniture legs
Prevents scratches during movement
Area Rugs
High traffic zones
Reduces wear and tear
Professional Services For Unmanageable Scratches
Deep scratches on wood floors can be stubborn. Professional help ensures a flawless finish. Experts bring life back to damaged floors. They have the right tools and techniques for any scratch.
When To Seek Professional Help
Visible scratches after DIY repair.
Deep, vast, or numerous scratches.
Scratches in high-traffic areas.
Are there any concerns about matching the wood’s finiwood’sentify these signs? Seek a professional floor service.
Types Of Professional Floor Restoration
Restoration Type
Description
Refinishing
The entire floor is sanded down and resealed.
Recoating
The top layer of the finish is applied.
Spot Repairs
Targeted repair of just the damaged areas.
Floor Sanding
Removes the top surface and any scratches.
Select your fit. Your floors will thank you!
Conclusion: Restoring Your Floor’s Beauty
scratched wood floors detract from your home’s sphomes. Yet, they’re used for despair. With the right approach, restoring the sheen and eliminating those blemishes can be straightforward. This section provides a brief wrap-up of home-based solutions and tips on maintaining your wood floor’s floor’s appeal.
Recap Of Home Solutions
Throughout our discussion, several effective DIY remedies have surfaced:
Walnut rub: Using walnuts to hide scratches is both ingenious and natural.
Sanding technique: Lightly sanding can renew the surface without harming the wood.
Wood stain: A touch of matching wood stain camouflages deeper scratches seamlessly.
Wood filler: For significant gouges, wood filler replenishes the floor’s floors.
Pick the proper fix based on the scratch’scratch’sd depth.
Maintaining The Floor’sFloor’sity
It’s critical to address not only current scratches but also prevent future damage:
Apply felt pads to furniture legs.
Keep pet nails trimmed neatly.
Lay rugs in high-traffic areas.
Remove shoes before walking on the floor.
Care Tip
Benefit
Regular Cleaning
Removes debris that can scratch.
Immediate Spill Cleanup
Prevents water damage and stains.
Professional Refinishing
Revitalizes overall floor appearance.
Regular care keeps your floor looking new for years to come.
Frequently Asked Questions For How To Fix Scratches On Wood Floor
Can Hardwood Floor Scratches Be Repaired?
Yes, hardwood floor scratches can be repaired. Minor abrasions often require a simple touch-up with a matching wood marker, while deep scratches may need wood filler and refinishing.
How Do You Get Deep Scratches Out Of Hardwood Floors Without Sanding?
To remove deep scratches from hardwood floors without sanding, apply a wood filler that matches the floor’s floor it dry, then gently buff the area with a soft cloth. Seal with a small amount of wood finish for protection.
Does Murphy’sMurphy’sp Remove Scratches?
Murphy’s Murphy’s is not designed to remove scratches. It cleans wooden surfaces but does not repair scratch damage.
How Do You Make Scratches Less Noticeable On Hardwood Floors?
Apply a matching wood filler and sand gently to minimize hardwood floor scratches. Finish with sealant or floor polish to blend and protect.
Conclusion
Reviving your wood floors is simpler than you think. Minor scratches can vanish with the right approach and elbow grease. Remember, patience and the correct materials work wonders. Follow these steps to bring back that seamless, polished look and enjoy your rejuvenated floors for years to come.
Keep shining!
Wood floors are charming until deep scratches turn them unsigh. Don’t fret! Tackling deep gouges is possible with the right DIY approach. Here’s a step-by-step guide to make those floors charming once again.
Stripping The Finish For Deep Scratches
Begin with a clean slate. Remove the old finish around the scratch. Use sandpaper to sand the area gently. Be patient – rushing could cause more damage. You’ve sanded down to bare you’re ready for the next step.
The Epoxy Wood Filler Technique
Epoxy wood filler is your best friend for fixing deep gets. It’s strong and molds into place. Follow these steps:
Clean the area first. No dirt should be in the scratch.
Mix the epoxy filler according to the instructions.
Apply the filler with a putty knife. Press firmly.
it’sre it’s level with the wood surface.
Let it dry. Check the label for drying times.
Once dry, sand the area until smooth.
Stain or paint to match the floor.
Finish with a sealant for protection.
This technique restores wood’s integrity, making floors look as good as new!
Color Matching And Finishing Touch:
You’ve smoothed out your scratched wood floor. The final steps are crucial. Depending on these finishing techniques, your repair will blend into the perfect floor’s look. We’ll dive into color matching and how to seal your hard work for long-lasting results.
Staining To Match ExistLet’sood
Let’s ensure your floor repair is invisible. The right stain makes a world of difference. Here’s a simple way to match your existing finish:
Clean the area to ensure the stain adheres well.
Test multiple stains on scrap wood to find the perfect match.
Apply the chosen stain to the scratch with the artist’s brush.
Wait for it to dry, then check if the color blends with your floor.
If needed, apply additional coats until you achieve the exact color.
Sealing The Scratch Repair
Next, we need to protect the stained area. Sealing locks in the color and prevents further damage:
Choose a sealant that matfloor’sur floor’s current finish.
Clean the stained area to remove any dust or debris.
Apply the sealant with a clean, soft cloth in a smooth layer.
Allow the sealant to dry as per the product instructions.
Apply a second coat if the area needs extra protection.
The repaired area is now safe from wear and tear. It looks just like new!
Preventive Measures For Scratch-free Floors
Keeping wood floors gleaming requires a proactive approach to minimize scratches. Preventive measures protect the wood’s surface to ensure longevity. By integrating regular maintenance and using floor protectives, floors stay scratch-free for years to come.
Regular Floor Care
Routine floor care is the first line of defense against scratches. Consider these tips:
Sweep daily with a soft bristle broom.
Use a microfiber mop to trap dirt and debris.
Clean spills immediately to prevent damage.
Avoid harsh cleaners; opt for PH-neutral solutions.
Protective Pads And Rugs
Protective accessories like pads and rugs act as a barrier:
Accessory
Placement
Benefit
Felt Pads
Under furniture legs
Prevents scratches during movement
Area Rugs
High traffic zones
Reduces wear and tear
Professional Services For Unmanageable Scratches
Deep scratches on wood floors can be stubborn. Professional help ensures a flawless finish. Experts bring life back to damaged floors. They have the right tools and techniques for any scratch.
When To Seek Professional Help
Visible scratches after DIY repair.
Deep, vast, or numerous scratches.
Scratches in high-traffic areas.
Are there any concerns about matching the wood’s finiwood’sentify these signs? Seek a professional floor service.
Types Of Professional Floor Restoration
Restoration Type
Description
Refinishing
The entire floor is sanded down and resealed.
Recoating
The top layer of the finish is applied.
Spot Repairs
Targeted repair of just the damaged areas.
Floor Sanding
Removes the top surface and any scratches.
Select your fit. Your floors will thank you!
Conclusion: Restoring Your Floor’s Beauty
scratched wood floors detract from your home’s sphomes. Yet, they’re used for despair. With the right approach, restoring the sheen and eliminating those blemishes can be straightforward. This section provides a brief wrap-up of home-based solutions and tips on maintaining your wood floor’s floor’s appeal.
Recap Of Home Solutions
Throughout our discussion, several effective DIY remedies have surfaced:
Walnut rub: Using walnuts to hide scratches is both ingenious and natural.
Sanding technique: Lightly sanding can renew the surface without harming the wood.
Wood stain: A touch of matching wood stain camouflages deeper scratches seamlessly.
Wood filler: For significant gouges, wood filler replenishes the floor’s floors.
Pick the proper fix based on the scratch’scratch’sd depth.
Maintaining The Floor’sFloor’sity
It’s critical to address not only current scratches but also prevent future damage:
Apply felt pads to furniture legs.
Keep pet nails trimmed neatly.
Lay rugs in high-traffic areas.
Remove shoes before walking on the floor.
Care Tip
Benefit
Regular Cleaning
Removes debris that can scratch.
Immediate Spill Cleanup
Prevents water damage and stains.
Professional Refinishing
Revitalizes overall floor appearance.
Regular care keeps your floor looking new for years to come.
Frequently Asked Questions For How To Fix Scratches On Wood Floor
Can Hardwood Floor Scratches Be Repaired?
Yes, hardwood floor scratches can be repaired. Minor abrasions often require a simple touch-up with a matching wood marker, while deep scratches may need wood filler and refinishing.
How Do You Get Deep Scratches Out Of Hardwood Floors Without Sanding?
To remove deep scratches from hardwood floors without sanding, apply a wood filler that matches the floor’s floor it dry, then gently buff the area with a soft cloth. Seal with a small amount of wood finish for protection.
Does Murphy’sMurphy’sp Remove Scratches?
Murphy’s Murphy’s is not designed to remove scratches. It cleans wooden surfaces but does not repair scratch damage.
How Do You Make Scratches Less Noticeable On Hardwood Floors?
Apply a matching wood filler and sand gently to minimize hardwood floor scratches. Finish with sealant or floor polish to blend and protect.
Conclusion
Reviving your wood floors is simpler than you think. Minor scratches can vanish with the right approach and elbow grease. Remember, patience and the correct materials work wonders. Follow these steps to bring back that seamless, polished look and enjoy your rejuvenated floors for years to come.
$2 to $2.5 Waterproof LVP in Augusta | Affordable Durable Flooring Discover why waterproof luxury vinyl plank (LVP) flooring priced between $2 and $2.5 per sq. ft. has become one…
Choosing Flooring in Augusta GA: Why the Climate Matters Augusta isn’t like Atlanta. High humidity, frequent rain, red clay, and older subfloors make flooring more than just a style decision.…
If you’re shopping for waterproof LVP in Augusta, you’ve likely encountered confusing specs and flashy “100% waterproof” claims. Let’s break it all down — real brands, real pricing, and the…